
I’ve been using Ruuvitags to measure different places around my house some time, and storing the data to my Zabbix installation. The GitHub repository below contains all the necessary files, as well as rudimentary install instructions.
You need to have a device that can run Python 3.7.x, has a compatible Bluetooth device and has the required Zabbix binaries. In addition you need to follow the ruuvitag-sensor repository guide for the prerequisits; ttu/ruuvitag-sensor: Python package for communicating with RuuviTag BLE Sensor and for decoding sensor data from broadcasted data (github.com)
BlueZ
BlueZ works only on Linux. When using BlueZ, Windows and macOS support is only for testing with hard-coded data and for data decoding.
BlueZ tools require superuser rights.
$ sudo apt-get install bluez bluez-hcidumpruuvitag-sensor package uses internally hciconfig, hcitool and hcidump. These tools are deprecated. In case tools are missing, an older version of BlueZ is required (Issue)
Python Modules Installation
Install the latest released version$ python -m pip install ruuvitag-sensor
Zabbix Scripts and Templates
- Install zabbix-agent or zabbix-agent2 and zabbix-sender
- Import Zabbix Template
- Clone git repository to /home/ruuvi/Ruuvitag and add u+x to the python files. Files in my example owned by the user ruuvi. (Zimeon-/Ruuvitag_Zabbix-RaspberryPi: Ruuvitag Sensor datacollection to Zabbix with RaspberryPi Debian (github.com))
- Configure your ruuvitags to the ruuvitags.json file (Bluetooth Mac, Zabbix Itemkey (Unique, without spaces or special characters), Displayname)
To find your Ruuvitags, you can run the find_tags.py python file manually. Example output below:
ruuvi@ruuvi:~/Ruuvitag $ python find_tags.py
Finding RuuviTags. Stop with Ctrl+C.
Start receiving broadcasts (device hci0)
FYI: Calling a process with sudo: hciconfig hci0 reset
FYI: Spawning process with sudo: hcitool -i hci0 lescan2 --duplicates --passive
FYI: Spawning process with sudo: hcidump -i hci0 --raw
F3:B5:BD:53:F8:9D
{'data_format': 5, 'humidity': 45.3, 'temperature': 24.38, 'pressure': 980.96, 'acceleration': 1016.8343031192447, 'acceleration_x': -36, 'acceleration_y': -20, 'acceleration_z': 1016, 'tx_power': 4, 'battery': 3101, 'movement_counter': 70, 'measurement_sequence_number': 27397, 'mac': 'aabbcc443355'}
DE:8C:F1:D8:E2:D4
{'data_format': 5, 'humidity': 51.04, 'temperature': 23.23, 'pressure': 981.06, 'acceleration': 1053.7703734685276, 'acceleration_x': 52, 'acceleration_y': -32, 'acceleration_z': 1052, 'tx_power': 4, 'battery': 3083, 'movement_counter': 29, 'measurement_sequence_number': 27431, 'mac': 'aabbcc662244'}
^CStop receiving broadcasts
- Add the following user parameters to your Zabbix agent configuration file. Remember to restart the Zabbix agent!
UserParameter=ruuvitag.get,python /home/ruuvi/Ruuvitag/get_data.py
UserParameter=ruuvitag.discover,python /home/ruuvi/Ruuvitag/discover_tags.py- Add the following cron to the user ruuvi with #crontab -e
*/1 * * * * python /etc/zabbix/scripts/ruuvitag/get_data.py- Verify functionality with Zabbix.
You can run the ruuvitag discovery manually in Zabbix frontend. This should create the neccessary items based on your ruuvitags.json file defined earlier.Note: These scripts assume that they are located in “/home/ruuvi/Ruuvitag/” directory. If you choose to save them somewhere else, remember to change these hardcoded paths.
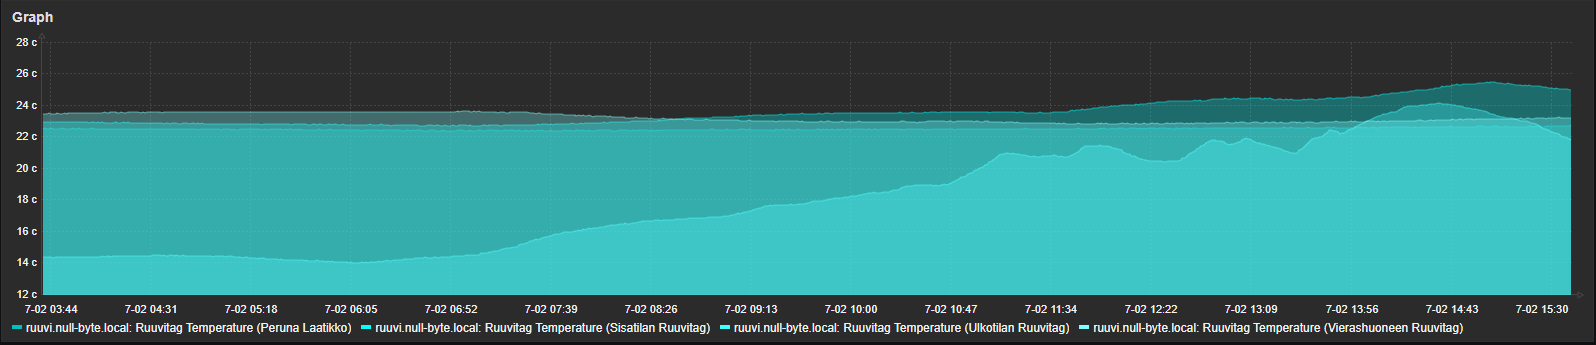
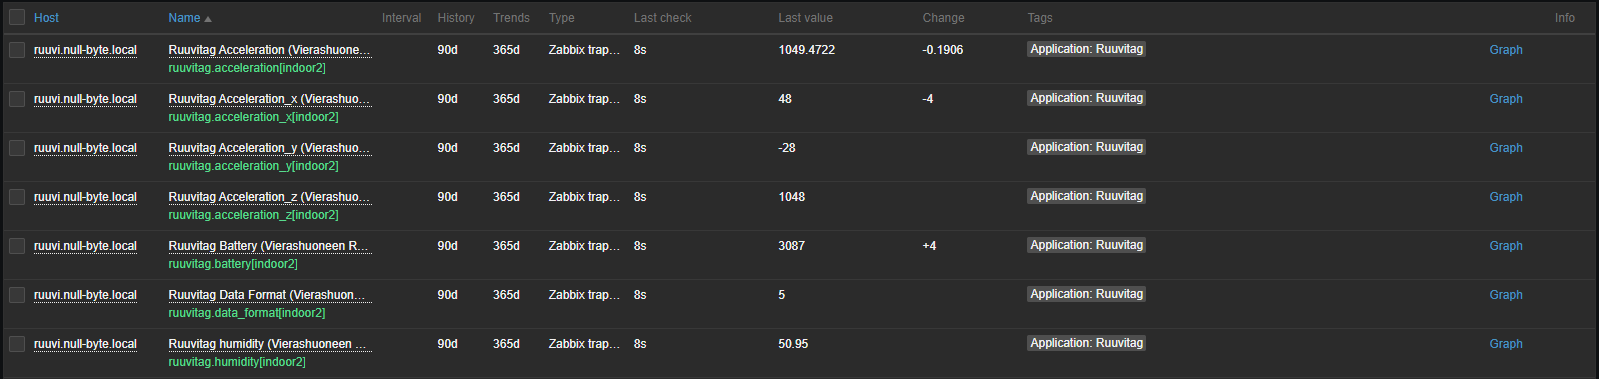
Create dashboards to your liking, and you can view the items and data in the hosts latest data.
Source for the project: Zimeon-/Ruuvitag_Zabbix-RaspberryPi: Ruuvitag Sensor datacollection to Zabbix with RaspberryPi Debian (github.com)